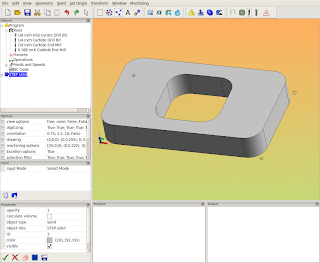
1. Look at the layout of HeeksCAD with the HeeksCNC installed :
 Notice that there is an Objects tree on the left side. This is how all the data for the cnc program is graphically represented. Double clicking in items in this tree usually causes the parameters of that particular item to be displayed and editable.
To create a toolpath in Heeks, you need a 'sketch' (geometry), a 'tool' (end mill, drill, etc...) , and an 'operation' (profile, pocket, drilling...). So the first thing needed to get this ball rolling is the 'sketch'. Here I select the face of a solid and right click on it. A dialog pops up and allows me to create sketches from the face.
The representation of the 'sketch' (or two sketches in this one) appears in the 'Objects tree':
I next select a sketch and one of the tools from the tree and then create an operation:
I selected a 'Profile' operation because I want to cut around the outside profile of this part.
I also did the same thing with the inner sketch, but this time used a smaller tool and then selected the 'Pocket' operation. In Heekscnc, the pocket operation dialog looks like this:
When I have a few operations set up, I usually get curious and want to see some results, so I usually post process what I have do far to see what the resulting tool paths look like:
Pressing the 'Post-Process' button causes the master python script to be built and placed in the 'Program' panel:
This is the same type of script that I blogged about last time. This script is run and creates a gcode file in the 'Output' panel.
So, there you have it- that is a basic rundown of how Heekscnc operates.
The thing that I want to stress in this post is that anything that is represented in the Objects tree will be translated to the master python script and later converted into gcode.


.png)
